![[bc]](http://images.squarespace-cdn.com/content/v1/5248ebd5e4b0240948a6ceff/1412268209242-TTW0GOFNZPDW9PV7QFXD/bcW_square+big.jpg?format=1000w)
Learn more about La Hacienda Casitas and our work in the RGV.
By Emily Axtman
Phase 1 of La Hacienda Casitas is underway! Site work has been going on for a few months now and the streets are beginning to take shape, as seen below. Up until now, the site progress has been horizontal: dirt has been moved around and wet/dry infrastructure has been installed. Although I've seen some pretty high mounds of dirt, nothing as vertical or as exciting as a house has started...until now!
Thus far, a total of 8 foundations have been poured. So what has been involved in this process?

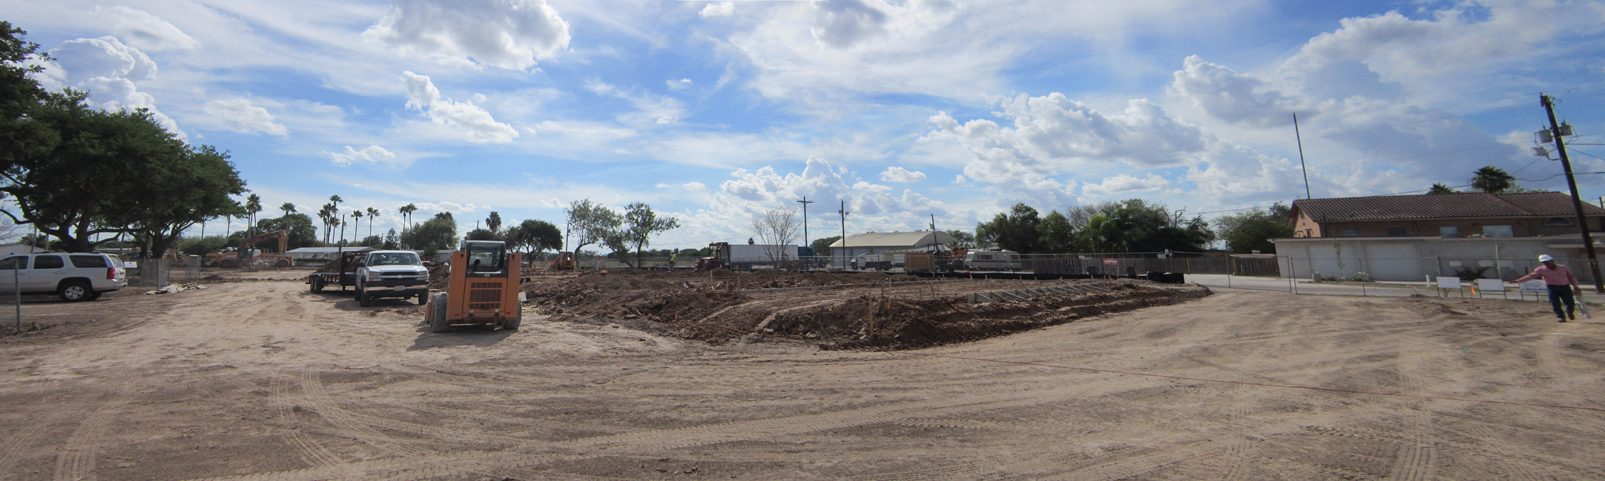
Standing at the northwest street corner facing the building pad of the first 10 houses.
Preparing the site:
In order to prep the site for the foundations, the Phase 1 area was first cleared 3', seen again in the photo above.

Preparing the pad:
(1) Due to soil instability in the Valley, 3' of select fill was required under each unit to ensure proper density and compaction ability. Select fill is used when native soils are not capable of adequately bearing the weight of the structure that will be built in that location.
(2) The select fill was then compacted in 6" deep increments, referred to as lifts. This process further ensures proper density and compaction.
(3) Once the fill was tested and the form-work constructed, a trencher was used to cut out the foundation lines. At this point, it looked like this:
I know what you're thinking. This photo looks the same as the last picture! If you look more closely you'll notice the built-up select fill and the beginning of the form-work.

Preparing the foundation:
The the select fill is piled high from the trenching while perimeters of the foundation are edged with form-work. After the form-work and trenching are complete, plumbing for the kitchen, bathroom, and utilities is roughed in. A plastic vapor barrier is then laid over the padding, tucked into the trenches and then stapled to the form-work. It is very important that the concrete be cast in a dry protected barrier and kept away from the soil. Continuous exposure to water and moisture can cause cracking in the concrete, leading to structural instability.

The rebar is assembled in stages onsite and set into the trenches first, then laid in a grid pattern on top of the padding. Because concrete has low tensile strength, reinforcement must be used that is high in tensile strength, such as steel rebar. Chairs, the dots in yellow above, are used to raise the rebar 2-3" above the padding. This ensures that the concrete will adhere to the rebar properly and surround it evenly. Once the rebar is inspected, it's time for the fun part... CONCRETE!

The concrete is spread evenly over the padding and into the trenches, then vibrated at the form-work edges to help the aggregate settle and release any air pockets.
Concrete is a composite material made up of an aggregate (such as stone), cement and water. When water is mixed with the dry aggregate and cement, a chemical process called hydration occurs, enabling the mixture to be molded and formed before hardening.
The timing and craft of pouring the foundation is key to the accuracy of the houses. Speaking to one of the foremen on-site, he said, "Pouring the foundations is the most stressful part of the process. Once we pour, it's final; so everything has to be right."
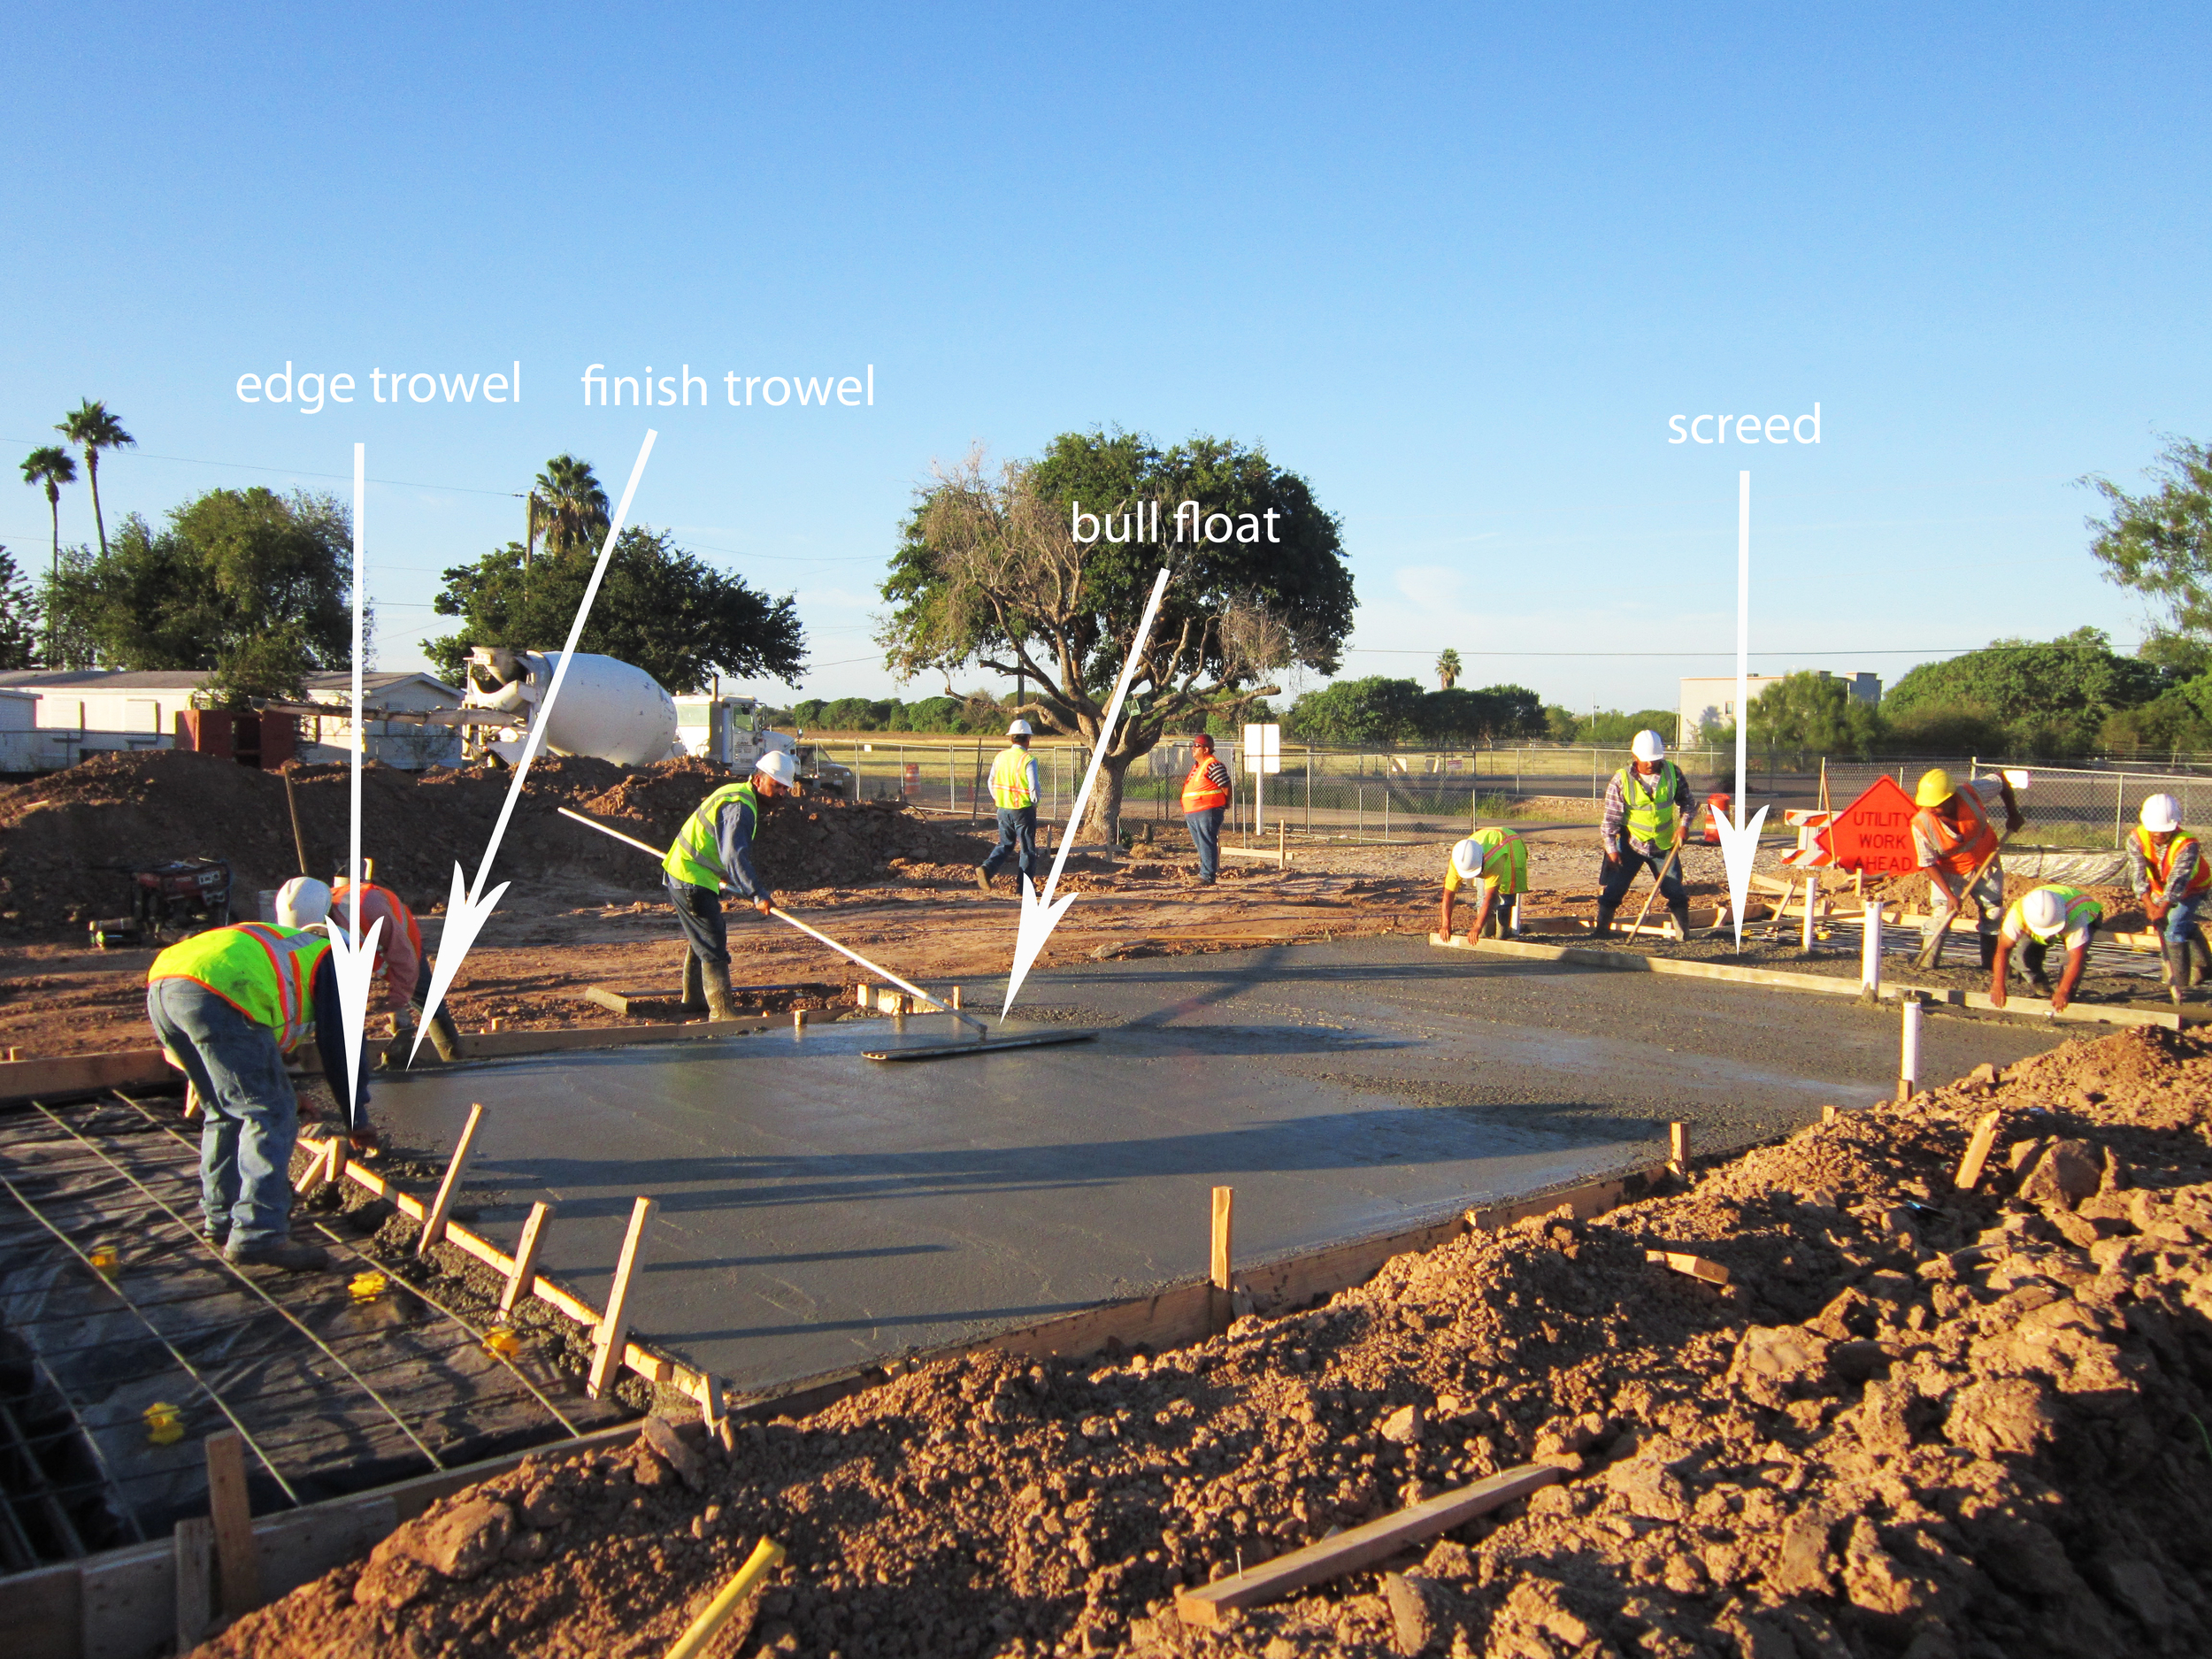
Once the concrete has been distributed evenly, it's roughly smoothed using a screed. As the larger aggregate begins to settle, a bull float is used to smooth the top layer of the finer aggregate. To complete the process, edge and finish trowels are used to refine the concrete surfaces.
As I learned at 5:30am in the morning, pouring concrete is an early event. In order for the concrete to set, the air temperature can't be too hot or too cold. If the temperature is below 50 degrees, the hydration process slows down; if too hot, hydration occurs too fast, causing differential temperatures in the concrete that can lead to cracking, as well as compromising the final strength of the concrete. Due to the Valley's high temperatures, it's important to start as early as possible to beat the heat.
Prior to any foundation pours, a sample is taken from the concrete trucks and tested later to verify the strength and composition of the mixture. According to the tester, the foundations will cure enough in about 3 days to start framing. Fully cured concrete takes about 21 days.